Thursday, July 21, 2022

ODA X5 - DB home creation error (racclonepl.sh)


Intro 


ODA (Oracle Data Appliance) virtualized platform is orchestrated by oakcli tool, Changes like database creation, database home creation, deleting database homes, etc need to be performed by oakcli tool. As this is fully scripted, we should have a clear understanding of oracle internals to troubleshoot issues encountered via oakcli tool.

Most of the issues encountered during oakcli commands execution are complicated but solutions are simpler. Even it comes to 19.13.0.0 environment is tune and sound. But to troubleshoot the issue my advice would be to analyze the log to find the root cause of the problem.

In addition, Oracle announces discontinue of  OVM , going forward oracle OVM is replace by KVM (Kernal Virtual machine)

ODA (Oracle Data Appliance) virtualized (OVM) based coming to end of support from 19.13. After 19.13 oracle will move with KVM base virtualization. In my view, KVM (Kernal virtual machine ) is much more stable than OVM.

In this article, I will cover to steps to create a new oracle 19.13 home and the issues we faced during the new database home creation.

Friday, June 24, 2022

Azure DB template image - Part 1 (VM creation, Oracle grid and db software only installation)


Intro

In the current era, businesses are focusing on optimizing  IT infrastructure workloads adopting cloud models like AWS, Azure, GCP and OCI.  Cloud environments provide many on-demand resources which enable organizations to unleash their full potential to expand their market share.

Also moving to the cloud enables greater flexibility to control IT infrastructure costs. In any organization, major workloads are coming from databases. Cloud platforms have many services to get a clear understanding of cost predictions for heavy workloads. 

When moving to the cloud it's really important to compare costs and the features each cloud provides. Microsft Azure came to the cloud in an early stage and it is a strong platform to migrate application and database workloads. Moreover, Migrating databases to azure is challenging and the ongoing market is really hot.

Many businesses want to have multiple test environments before moving to prod changes. It's important to create custom images and build an environment quickly and efficiently. In this article, I will cover how we can create an oracle custom snapshot to create a VM.

Let's start with VM creation.

Create a VM in azure

Login to the Azure portal and select virtual machine


Azure work as an on-demand subscription model. Provide a suitable name for VM and Region (Better to go with the closest region to avoid network latency. Select the respective availability zone and the security type.

Here I'm going to use OEL 8.5 and the server model is standard D2s_v3 for this testing. Database workload it's recommended to go with E - Series. E- Series servers are memory-optimized servers to cater to database workloads. Also for the database servers, azure has a really good selection of memory-optimized VM templates.

Shared below mention links to get a better understanding of server versions and associate costs for each server.


Server Versions 

https://azure.microsoft.com/en-ca/pricing/details/virtual-machines/series/

Associate cost 

https://azure.microsoft.com/en-ca/pricing/details/virtual-machines/linux/#edv4-series


There are two options setup an administrator password.

  1. Setup user and a strong password.
  2. Use generated the ssh public key 


As this is oracle ASM (standalone installation ) I have added 4 disks including 2 disks for DATA (external redundancy) and one FRA. 


As this is a test I'm using public IP address. Make sure to create Virtual-network then only you can select this Virtual network.


The last step for VM creation check validation is passed.


Partitioning of disk and mount /u01


Execute lsblk to view all the attached disks and use fdisk commands to partition the disk. Once you format the partition disk to the ext4 file system make sure to add this to the disk to the partition table by executing partprob. Do not miss this step, if you missed this VM will not come up and will hand on the boot section.

These are the commands you needs to be execute to add partition to vm.

##### correct commands 
fdisk /dev/sdc1
mkfs.ext4 /dev/sdc1
partprobe /dev/sdc1
blkid
mkdir /u01
mount -a -- after adding this disk blkid to fstab

After creating a partition , you can use lsblk to validate partition


[azuser@localhost ~]$ lsblk
NAME               MAJ:MIN RM  SIZE RO TYPE MOUNTPOINT
sda                  8:0    0   30G  0 disk
├─sda1               8:1    0  800M  0 part /boot
├─sda2               8:2    0 28.7G  0 part
│ ├─rootvg-rootlv  252:0    0 18.7G  0 lvm  /
│ └─rootvg-crashlv 252:1    0   10G  0 lvm  /var/crash
├─sda14              8:14   0    4M  0 part
└─sda15              8:15   0  495M  0 part /boot/efi
sdb                  8:16   0   75G  0 disk
└─sdb1               8:17   0   75G  0 part /mnt
sdc                  8:32   0  128G  0 disk
└─sdc1               8:33   0  128G  0 part 
sdd                  8:48   0  512G  0 disk
└─sdd1               8:49   0  512G  0 part
sde                  8:64   0  512G  0 disk


Sample blkid output


Execute partprobe command to add a disk to the partition table and use mkfs.ext4 to format the disk.  As the last step execute blkid to get the respective block id .


[root@oradb-01 ~]# blkid
/dev/mapper/rootvg-crashlv: UUID="cdf585f6-703a-4aef-b8de-404c9883a58e" BLOCK_SIZE="512" TYPE="xfs"
/dev/sde2: UUID="Z1I6oC-RWrU-DQPh-tkiS-VZP3-aGNb-khAaSc" TYPE="LVM2_member" PARTUUID="7239f924-9e5f-406f-b5b7-88862e86ea8d"
/dev/sde1: UUID="c5d1e180-5e1d-43c6-9ed6-c8ac37cb8061" BLOCK_SIZE="512" TYPE="xfs" PARTUUID="83c7509b-9398-4ca4-847a-59f03e4f9577"
/dev/sde14: PARTUUID="1833132d-49f6-4ae0-861a-30eda86be687"
/dev/sde15: SEC_TYPE="msdos" UUID="3503-1054" BLOCK_SIZE="512" TYPE="vfat" PARTLABEL="EFI System Partition" PARTUUID="0c2aee3b-7c66-42e5-91b3-52a8d2d7db16"
/dev/sdf1: UUID="06cd70bc-adec-4ab9-951e-eada6e45941d" BLOCK_SIZE="4096" TYPE="ext4" PARTUUID="619336a7-01"
/dev/sda1: UUID="6f9f562e-afe1-423e-8846-9ab001150f7c" BLOCK_SIZE="4096" TYPE="ext4" PARTUUID="727ac55d-01"
/dev/mapper/rootvg-rootlv: UUID="c866304a-09ef-4c3b-87cf-00f321a52356" BLOCK_SIZE="512" TYPE="xfs"
[root@oradb-01 ~]#

lsblk output mount /u01


[azuser@localhost ~]$ lsblk
NAME               MAJ:MIN RM  SIZE RO TYPE MOUNTPOINT
sda                  8:0    0   30G  0 disk
├─sda1               8:1    0  800M  0 part /boot
├─sda2               8:2    0 28.7G  0 part
│ ├─rootvg-rootlv  252:0    0 18.7G  0 lvm  /
│ └─rootvg-crashlv 252:1    0   10G  0 lvm  /var/crash
├─sda14              8:14   0    4M  0 part
└─sda15              8:15   0  495M  0 part /boot/efi
sdb                  8:16   0   75G  0 disk
└─sdb1               8:17   0   75G  0 part /mnt
sdc                  8:32   0  256G  0 disk
└─sdc1               8:33   0  256G  0 part /u01
sdd                  8:48   0  512G  0 disk
└─sdd1               8:49   0  512G  0 part
sde                  8:64   0  512G  0 disk


Azure documentation is very well organized and crystal clear on ASM installation steps. Please find the below mention links from azure knowledge base for asm installation.

https://docs.microsoft.com/en-us/azure/virtual-machines/workloads/oracle/configure-oracle-asm

Installed required RPMs for Oracle 19c database

Download and install oracle-preinstall-19c rpm and installed it on the server.


curl -o oracle-database-preinstall-19c-1.0-1.el7.x86_64.rpm https://yum.oracle.com/repo/OracleLinux/OL7/latest/x86_64/getPackage/oracle-database-preinstall-19c-1.0-1.el7.x86_64.rpm
yum -y localinstall oracle-database-preinstall-19c-1.0-1.el7.x86_64.rpm

Installed required RPMs for oracle 19c grid


First installed oracle-database-preinstalled-19c rpm , Once the preinstalled is complete, Make sure to install required oracleasm RPMs , we need these RPMs for asm disk configuration.


[root@oradb-01 ~]# rpm -qa |grep oracleasm
kmod-redhat-oracleasm-2.0.8-12.2.0.1.el8.x86_64
oracleasm-support-2.1.12-1.el8.x86_64
oracleasmlib-2.0.17-1.el8.x86_64
[root@oradb-01 ~]#


Add required groups and users for the installation. Creating only oracle user for both grid and db installation


groupadd -g 54345 asmadmin 
groupadd -g 54346 asmdba 
groupadd -g 54347 asmoper 
useradd -u 3000 -g oinstall -G dba,asmadmin,asmdba,asmoper oracle 
usermod -g oinstall -G dba,asmdba,asmadmin,asmoper oracle

Configure ASM

After installing the asm , configure the ASM library for server startup.


[root@oradb-01 ~]# oracleasm configure -i
Configuring the Oracle ASM library driver.

This will configure the on-boot properties of the Oracle ASM library
driver.  The following questions will determine whether the driver is
loaded on boot and what permissions it will have.  The current values
will be shown in brackets ('[]').  Hitting ENTER without typing an
answer will keep that current value.  Ctrl-C will abort.

Default user to own the driver interface []: oracle
Default group to own the driver interface []: asmadmin
Start Oracle ASM library driver on boot (y/n) [n]: Y
Scan for Oracle ASM disks on boot (y/n) [y]: Y
Writing Oracle ASM library driver configuration: done
[root@oradb-01 ~]#

Once the configuration is complete validate the asm status, Make sure the status is correct after restarting the oracleasm service, If there are any errors this going to impact on server startup.

Validate server status


[root@oradb-01 ~]# oracleasm status
Checking if ASM is loaded: yes
Checking if /dev/oracleasm is mounted: yes
[root@oradb-01 ~]#

Validate from systemctl


[root@oradb-01 ~]# systemctl start oracleasm
[root@oradb-01 ~]# systemctl status oracleasm
● oracleasm.service - Load oracleasm Modules
   Loaded: loaded (/usr/lib/systemd/system/oracleasm.service; enabled; vendor preset: disabled)
   Active: active (exited) since Thu 2022-06-23 17:23:51 UTC; 5s ago
  Process: 16982 ExecStart=/usr/sbin/oracleasm.init start_sysctl (code=exited, status=0/SUCCESS)
 Main PID: 16982 (code=exited, status=0/SUCCESS)

Jun 23 17:23:50 oradb-01 systemd[1]: Starting Load oracleasm Modules...
Jun 23 17:23:50 oradb-01 oracleasm.init[16982]: Initializing the Oracle ASMLib driver: OK
Jun 23 17:23:51 oradb-01 oracleasm.init[16982]: Scanning the system for Oracle ASMLib disks: OK
Jun 23 17:23:51 oradb-01 systemd[1]: Started Load oracleasm Modules.


Create a directory for grid and DB installation


mkdir -p /u01/app/19.0.0.0/grid 
mkdir -p /u01/app/oracle/product/19.0.0/dbhome_1
chown oracle:oinstall /u01/app/19.0.0.0/grid
chown oracle:oinstall /u01/app/oracle/product/19.0.0/dbhome_1

19C grid installation

Here we will perform a software-only installation because we are going to use these images later to create new environments.

I have posted the screenshots for software-only installation. As per this figure select only the "Set up Software Only".


As per the below-mentioned figure select the respective ASM group for the installation.


As this is a test installation ignore the physical memory requirement.


Installation summary 


Execute root.sh scripts as root to complete the installation.


Expected root.sh outputs.


[root@oradb-01 ~]# /u01/app/oraInventory/orainstRoot.sh
Changing permissions of /u01/app/oraInventory.
Adding read,write permissions for group.
Removing read,write,execute permissions for world.

Changing groupname of /u01/app/oraInventory to oinstall.
The execution of the script is complete.
[root@oradb-01 ~]# /u01/app/19.0.0.0/grid/root.sh
Performing root user operation.

The following environment variables are set as:
    ORACLE_OWNER= oracle
    ORACLE_HOME=  /u01/app/19.0.0.0/grid

Enter the full pathname of the local bin directory: [/usr/local/bin]:
   Copying dbhome to /usr/local/bin ...
   Copying oraenv to /usr/local/bin ...
   Copying coraenv to /usr/local/bin ...


Creating /etc/oratab file...
Entries will be added to the /etc/oratab file as needed by
Database Configuration Assistant when a database is created
Finished running generic part of root script.
Now product-specific root actions will be performed.

To configure Grid Infrastructure for a Cluster or Grid Infrastructure for a Stand-Alone Server execute the following command as oracle user:
/u01/app/19.0.0.0/grid/gridSetup.sh
This command launches the Grid Infrastructure Setup Wizard. The wizard also supports silent operation, and the parameters can be passed through the response file that is available in the installation media.

[root@oradb-01 ~]#


 DB Installation

As I mentioned earlier, We are going to use these images to create new database servers so we should perform a software-only installation.


Azure does not support oracle-RAC installation, so make sure to select a single instance only.


Select respective edition, Here I will select Enterprise Edition.


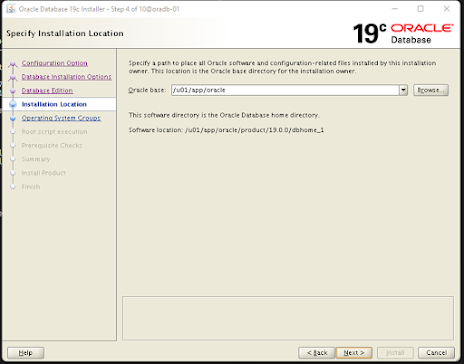
Specify the base directory 


Select required roles for installation.


I have not provided the sudo privileges to run the root.sh script.


Validate the pre-requisites page. I will create another blog to configure the swap mount in azure.


Execute root.sh as root to complete the installation.


Create a Snapshot of the disk

Once the grid and database software only installations are complete without any issue.
We need to power off the server to get the consistency of disk images.


We need to take two snapshots 
  1. OS disk
  2. Oracle binary installation disk

Under mentioned figure shows the create snapshot option after navigating to the disk.


Once the disk snapshots are created, navigate to the snapshot tab to verify the snap disk.


Conclusion

In this article, I have covered VM creation and installation of the grid and DB. Azure does not have template images with Oracle ASM installation. In part 2, I will cover the new VM creation using these snap disks.


Monday, June 6, 2022

ODA - 18.8.0.0 - OVM upgrade issue


ODA (Oracle Data Appliance) upgrades are challenging and need to be ready to spend more hours on upgrades due to unexpected failures.  As a proactive measurement, you should be ready to face these unexpected failures by creating a proactive SR with oracle. In this article, I will cover the upgrades issue encountered for 18.3.0.0 to 18.8.0.0.  The major component in the upgrading is the grid.

We encountered a major issue while upgrading the OVM on DOM0. Even if the component shows that the OVM version is up to date, oakcli orchestration tool revalidates this version by rerunning the required rpm on dom0 and the bug was hitting on opensm component , opensm is "an InfiniBand compliant Subnet Manager and Administration"


Using "oakcli update -patch 18.8.0.0.0 --verify" commands can verify the patch version after unpack.


###### localhost
[root@localhost ~]# oakcli update -patch  18.8.0.0.0 --verify
INFO: 2022-05-27 22:00:05: Reading the metadata file now...
                Component Name            Installed Version         Proposed Patch Version
                ---------------           ------------------        -----------------
                Controller_INT            4.650.00-7176             Up-to-date
                Controller_EXT            13.00.00.00               Up-to-date
                Expander                  0018                      001E
                SSD_SHARED {
                [ c1d20,c1d21,c1d22,      A29A                      Up-to-date
                c1d23 ]
                [ c1d16,c1d17,c1d18,      A29A                      Up-to-date
                c1d19 ]
                             }
                HDD_LOCAL                 A7E0                      Up-to-date
                HDD_SHARED {
                [ c1d0,c1d1,c1d2,c1d      PAG1                      PD51
                3,c1d4,c1d6,c1d7,c1d
                8,c1d9,c1d10,c1d12,c
                1d13,c1d14,c1d15 ]
                [ c1d5,c1d11 ]            PD51                      Up-to-date
                             }
                ILOM                      4.0.2.26.b r125868        4.0.4.52 r132805
                BIOS                      30130500                  30300200
                IPMI                      1.8.12.4                  1.8.15.0
                HMP                       2.4.1.0.14                2.4.5.0.1
                OAK                       18.3.0.0.0                18.8.0.0.0
                OL                        6.10                      Up-to-date
                OVM                       3.4.4                     Up-to-date
                GI_HOME                   18.3.0.0.180717           18.8.0.0.191015
                DB_HOME                   12.1.0.2.160119           12.1.0.2.191015
                ASR                       18.3.1                    19.4.0
[root@localhost ~]#

This OVM issue was directly impacting patching from 18.3.0.0 to 18.8.0.0, DOM0 patching failed when trying to upgrade to OVM to 3.4.4. While upgrading DOM0, stopping the opensm using the command "service opensmd stop" caused the process to not come up after the network service restart . Parameters are read from the “/etc/rc.local” file.

Below is the main server patching log.

Error 

Main Server Patching Log : 

This is the main server patch log and highlighted OVM update error for clarity.

2022-05-28 04:44:03: Executing cmd: /u01/app/18.0.0.0/grid/bin/crsctl check cluster
2022-05-28 04:44:03: Command output:
>  CRS-4535: Cannot communicate with Cluster Ready Services
>  CRS-4530: Communications failure contacting Cluster Synchronization Services daemon
>  CRS-4534: Cannot communicate with Event Manager , 
>End Command output
2022-05-28 04:44:03: SUCCESS:  Successfully stopped the clusterware on local node
2022-05-28 04:44:03: Executing cmd: /opt/oracle/oak/bin/oakcli fstop oak
2022-05-28 04:44:06: Command output:
>  2022-05-28 04:44:03.583081370:[init.oak]:[Stopping oakd]
>  2022-05-28 04:44:06.640504545:[init.oak]:[Successfully stopped the oakd..] , 
>End Command output
2022-05-28 04:49:34: WARNING:  Unable to update the device OVM to:  3.4.4


DOM0 Log :

Dom0 log is trying to obtain a value from running the pgrep opensm command. Opensm services need to be up and running to obtain the value. These logs are useful to get a clear picture of the problem “/var/log/opensm.log” and “/var/log/messages”.


2022-05-28 04:51:02,732 root DEBUG Running: pgrep opensm
2022-05-28 04:51:02,813 root DEBUG Failed to run the cmd: pgrep opensm

Solution

Make sure to backup the “/etc/rc.local” file before making any changes. New parameters “-y” to opensm service.

Use the below mention link to get an idea of the opensm parameters.


-y, --stay_on_fatal

This option will cause SM not to exit on fatal initialization issues: if SM discovers duplicated guides or a 12x link with lane reversal badly configured. By default, the SM will exit on these errors.


-- Before
[root@localhost patch]# cat /etc/rc.local | grep -i opensm
service opensmd stop
opensm -g 0x0010e00001889ad9 -W -p 15 -B
opensm -g 0x0010e00001889ada -W -p 0 -B

-- After 
[root@localhost patch]# cat /etc/rc.local | grep -i opensm
service opensmd stop
opensm -y -g 0x0010e00001889ad9 -W -p 15 -B
opensm -y -g 0x0010e00001889ada -W -p 0 -B


Conclusion

Before the reboot, I strongly recommend you run these commands in both the nodes' terminals before the restart. This helps to validate commands giving any errors.

Expected output :


-- Node01
[root@localhost patch]# opensm -y -g 0x0010e00001889ad9 -W -p 15 -B
-------------------------------------------------
OpenSM 3.3.19
 Reading Cached Option File: /etc/opensm/opensm.conf
-E- Parsing error in field guid, expected numeric input received: 0x0010e00001889ad9 0x0010e00001889ada
 Unrecognized token: "max_seq_redisc"
 Unrecognized token: "rereg_on_guid_migr"
 Unrecognized token: "aguid_inout_notice"
 Unrecognized token: "sm_assign_guid_func"
 Unrecognized token: "reports"
 Unrecognized token: "per_module_logging"
 Unrecognized token: "consolidate_ipv4_mask"
Command Line Arguments:
 Staying on fatal initialization errors
 Guid 0x10e00001889ad9
 Priority = 15
 Daemon mode
 Log File: /var/log/opensm.log
 
--------------------------------------------------------------------------------
--------------------------------------------------------------------------------

[root@localhost patch]# opensm -y -g 0x0010e00001889ada -W -p 0 -B
-------------------------------------------------
OpenSM 3.3.19
 Reading Cached Option File: /etc/opensm/opensm.conf
-E- Parsing error in field guid, expected numeric input received: 0x0010e00001889ad9 0x0010e00001889ada
 Unrecognized token: "max_seq_redisc"
 Unrecognized token: "rereg_on_guid_migr"
 Unrecognized token: "aguid_inout_notice"
 Unrecognized token: "sm_assign_guid_func"
 Unrecognized token: "reports"
 Unrecognized token: "per_module_logging"
 Unrecognized token: "consolidate_ipv4_mask"
Command Line Arguments:
 Staying on fatal initialization errors
 Guid 0x10e00001889ada
 Priority = 0
 Daemon mode
 Log File: /var/log/opensm.log
-------------------------------------------------
[root@pinode0 patch]#


12.1.2.10 - 12.1.2.12 - ODA upgrade - Pre-patching issue


ODA upgrades elevate technical knowledge to a different level for each upgrade. Each upgrade gives you a new obstacle to tackle in a limited time. 

While upgrading ODA from 12.1.2.10 to 12.1.2.12 found some unusual issue that was hitting during the pre-patching stage.

Patching was executed from the Master - node. The master node can be identified by executing the oakcli show ismaster


[root@piodadb1 ~]# oakcli show ismaster
OAKD is in Master Mode
[root@piodadb1 ~]#

Patching got stuck on the "/opt/oracle/oak/pkgrepos/System/12.1.2.12.0/bin/copydom0patch.py 12.1.2.12.0 http://192.168.18.1:7882" step. 

This step is used to copy the patch bundle into dom0  and extract the bundle. Once the extraction is complete same script will be used to apply the upgrade on dom0.

This was the log that was not moving for more than 45 min. 

Error: ODA_BASE


>End Command output
2022-01-22 11:26:52: Setting the DATA:RECO ratio to 43:57
2022-01-22 11:26:52: Executing cmd: /opt/oracle/oak/bin/oakcli modify config -DATA 43
2022-01-22 11:26:52: Executing cmd: python -c 'import sys;sys.path.append("/opt/oracle/oak/adapters/");import common_agentutils as cu;node=cu.getvmagentnodes();print("IP1:%s"%node[0]["IP"]);print("IP2:%s"%node[1]["IP"]);print("port1:%s"%node[0]["port"]);print("port2:%s"%node[1]["port"]);'
2022-01-22 11:26:52: Command output:
>  IP1:192.168.18.1
>  IP2:192.168.19.1
>  port1:7882
>  port2:7882 ,
>End Command output
2022-01-22 11:26:52: This is V4 machine
2022-01-22 11:26:52: Executing cmd: /opt/oracle/oak/pkgrepos/System/12.1.2.12.0/bin/copydom0patch.py 12.1.2.12.0 http://192.168.18.1:7882  -- Hanging for 45 min 

This is the part of the dom0 log that is located under /opt/oracle/oak/log/<hostname>/patch/oakpatching_*.log log updates were stuck after the extraction.

DOM0 : log


2000-09-21 09:38:32,942 root DEBUG Running: mkdir -p /tmp/otpatchdir
2000-09-21 09:38:33,006 root DEBUG Successfully run the command: mkdir -p /tmp/otpatchdir
2000-09-21 09:42:47,355 root DEBUG Running: cat /tmp/otpatchdir/* > /opt/oracle/oak/pkgrepos/orapkgs/OVS/12.1.2.12.0/Base/OAKPatchBundle_12.1.2.12.0_170926.tar
2000-09-21 09:42:56,241 root DEBUG Successfully run the command: cat /tmp/otpatchdir/* > /opt/oracle/oak/pkgrepos/orapkgs/OVS/12.1.2.12.0/Base/OAKPatchBundle_12.1.2.12.0_170926.tar
2000-09-21 09:42:56,242 root DEBUG Running: tar -xof  /opt/oracle/oak/pkgrepos/orapkgs/OVS/12.1.2.12.0/Base/OAKPatchBundle_12.1.2.12.0_170926.tar  -C  /opt/oracle/oak

Root Cause


In the script there is the exception clause with a sleep command after the extraction, In our case the system time of both ODA_BASE and DOM0 environment was different, somehow DOM0 time was Set to the year 2000 and ODA_BASE was in 2022.

 
Due to these different server times, the script was not moving and kept issuing the sleep function.


[root@localhost~]# cat /opt/oracle/oak/pkgrepos/System/12.1.2.12.0/bin/copydom0patch.py
#!/usr/bin/python
import os
import sys
import glob
import socket
import time
import httplib
from SimpleXMLRPCServer import SimpleXMLRPCServer
import xmlrpclib
from subprocess import Popen,PIPE

#TODO error handling
OAK_HOME = "/opt/oracle/oak"
version = sys.argv[1]
dom0addr = sys.argv[2]
fileloc = os.path.join(OAK_HOME, "pkgrepos", "orapkgs", "OVS", version, "Base/*")
filelist = glob.glob(fileloc)
srcfile = filelist[0]

tmppatchdest = os.path.join("/", "tmp", "otpatchdir")
tmppatchfile = os.path.join(tmppatchdest, "dom0patchfile.zip")

# create a temporary dir
cmd = "rm -rf " + tmppatchdest
proc = Popen(cmd, shell=True, stderr=PIPE, stdout=PIPE)
proc.wait()
cmd = "mkdir -p " + tmppatchdest
proc = Popen(cmd, shell=True, stderr=PIPE, stdout=PIPE)
proc.wait()

#split the patch file
cmd =  "split -b 25000000 -d "+ srcfile + " " +tmppatchfile
proc = Popen(cmd, shell=True, stderr=PIPE, stdout=PIPE)
proc.wait()

# get a server connection object
#proxy = xmlrpclib.ServerProxy("http://192.168.16.24:7881")
proxy = xmlrpclib.ServerProxy(dom0addr);

# bug20645053: First try to ping and see if the DOM0 agent is alive
# We do this only 3 times.


This was causing the issue due to different times on oda and dom0


count = 0
while (count < 2):
    try:
        print "trying to ping the dom0 agent"
        proxy.ping()
        count = 6
    except:
        time.sleep(60) <- This was causing the issue due to different times on oda and dom0
        count = count + 1

try:
    proxy.ping()
    print "successfully pinged the dom0 agent\n"
except (socket.error, xmlrpclib.Fault ,xmlrpclib.ProtocolError, xmlrpclib.ResponseError, httplib.InvalidURL), err:
    print "fatal error: could not ping DOM0 agent"
    print "exception %s", err
    sys.exit(1)

#create the destination area
# bug20645053: If we are unable to create a socket then exit
# with a "fatal error" message.
try:
    out = proxy.mkdest(tmppatchdest)
except (socket.error), err:
    print "fatal error: could not connect to the DOM0 agent"
    print "exception %s", err
    sys.exit(1)

#copy the patchfile to destination
globdir = os.path.join(tmppatchdest, "*")
for file in glob.glob(globdir):
    file = file.strip('\t\n\r')
    handle = open(file, "rb")
    out = proxy.copypatch(tmppatchdest, file, xmlrpclib.Binary(handle.read()))

# remove the  temporary dir
cmd = "rm -rf " + tmppatchdest
proc = Popen(cmd, shell=True, stderr=PIPE, stdout=PIPE)
proc.wait()


Conclusion

Before starting the update make sure to validate the server timing on all the nodes including dom0. I would recommend configuring NTP on all the servers which gives you better control over the server timing.  

Friday, May 20, 2022

Rackware - Workload Migration (RMM) - Part 1


Migrating application and database servers from on-prem to cloud is really challenging. Current era organizations are focusing to stretch towards clouds to optimize their workloads.  This gives immense pressure on IT architects and administrators on how swiftly and smoothly they can migrate servers to the cloud.  

After the migration, the next challenge is to have an optimal DR strategy. The best practice would be replicating the servers to different regions.  There are many tools in the market to address these challenges,  

RMM is a great tool to address migrations and DR strategies.

Product Overview

RackWare Migration Manager (RMM) is a third-party application that we employ as a Cloud Migration and Disaster Recovery solution. RMM is compatible with all of the major cloud providers including Oracle, Azure, AWS, and Google Cloud, and can also be used in On-premise scenarios.

The product consists of following areas :
  1. Discovery and Analysis
  2. Workload Migration
  3. Disaster Recovery and Backup
When organizations are planning to move their current VMware, Hyper-V, or Oracle VM to the cloud, RackWare is a really good solution to cater to this environment. This migration methodology in addressing migration at the VM level.

The following figures illustrate the RackWare Technology Support matrix:


At a high level, the RackWare CloudMotion process consists of:

1. Provisioning of the RackWare RMM instance.

2. Setup network ingress and egress rules allowing communication between source and target networks.

3. Initialize and license the RMM Server then start the RMM service.

4. Configuring SSH connectivity between source and the target server.

5. Create Cloud User and Policies

6. Create and configure a ‘Wave’ within the RackWare Admin UI. 

Note: If we are planning to use the same IP Address Subnets on the source and target networks we will require a bridge network.


The following is a link to RackWare documenation outlining the above process in greater detail.

Rackware RMM Migration Getting Started for Oracle  Marketplace | Hybrid Cloud Management Platform | Cloud Management Platform | RackWare


This figure illustrates how the RackWare Bridge provides the IP Aliasing.


Simplified diagram of the RRM to Bridge Server communication:


RackWare has different feature sets, unlocked via licensing options:

  1. RackWare Migration Manager
  2. RackWare Migration Manager (RMM) BYOL
  3. RackWare Disaster Recovery (SMB)
As a partner, to obtain licensing for POC purposes we can email licensing@rackwareinc.com to obtain a 30 day trial license.

Deployment Scenarios

There are 3 ways to deploy the RMM software.
  1. Install the software from yum package to RedHat Linux and derivative operating systems (eg Oracle Linux and CentOS).
  2. Import image from OCI block storage

https://objectstorage.us-ashburn-1.oraclecloud.com/p/3ShJEeISW-IgvrynXI1BMYUVNMc-4R2o8kaVcvI7S8T4MDE7-LQAXvw2ZNAxcRA1/n/rworacleuniversal/b/rackware-mkt-storage/o/RMM-7_4_0_307-base

  3. Provisioning from an OCI Marketplace image


In this article, we covered only product overview and deployment methods. Next article we will cover the installation and configuration part of the RMM server.

Sunday, May 15, 2022

Clone 12c RDBMS Binary


We are currently living in the cloud era and the majority of organizations want to expand their database workloads to the cloud. The cloud environment gives a clear picture of costs and gives more flexibility to optimize the workload. challenging parts come when the organization wants to migrate on-prem database workloads to cloud environments. Even it comes to Oracle databases migration there are many aspects to address.

As a first step, migrating Oracle workloads from on-prem to cloud environment we need to make sure oracle binary levels are identical, It's important to match patch levels before working on a fresh installation. Installed patches can be compared via opatch utility tool by running "./opatch lspatches "

Here is a sample output below


[oracle@localhost OPatch]$

[oracle@localhost]$ ./opatch lspatches
33192694;OJVM RELEASE UPDATE: 19.13.0.0.211019 (33192694) 33192793;Database Release Update : 19.13.0.0.211019 (33192793) 33208123;OCW RELEASE UPDATE 19.13.0.0.0 (33208123) OPatch succeeded. [oracle@localhost]$


Installing the oracle RDBMS binary takes a considerable amount of effort and time. To address this matter, Oracle has introduced the method to perform binary cloning. Before cloning makes sure to install the required RPMs for Oracle RDBMS. 

In this article, I will cover the cloning steps and issue encountered during this cloning process.

There are many benefits of cloning the RDBMS binary, A few benefits are listed below.

  • One time installation and clone the installation to all other servers.
  • Simple to perform and it saves time and effort.
  • No need to fire Oracle Installer on all servers.

Consistent RDBMS binary backup can be taken from the source database by stopping the running database and the listener.

Backup RDBMS HOME


############# Clone db home
cd /u01/app/oracle/product/12.1.0.2/
tar -cvf /backup/12C_BINARY_BKP/db_home_1_26012022_${HOSTNAME}.tar dbhome_1

Clone RDBMS binary

Running below mention commands with "/u01/app/oracle/product/12.1.0.2/dbhome_1/clone/bin/clone.pl" helps to clone oracle binary.


/u01/app/oracle/product/12.1.0.2/dbhome_1/perl/bin/perl /u01/app/oracle/product/12.1.0.2/dbhome_1/clone/bin/clone.pl \
ORACLE_BASE="/u01/app/oracle/" ORACLE_HOME="/u01/app/oracle/product/12.1.0.2/dbhome_1" OSDBA_GROUP=dba -defaultHomeName

Sample output


/u01/app/oracle/product/12.1.0.2/dbhome_1/perl/bin/perl /u01/app/oracle/product/12.1.0.2/dbhome_1/clone/bin/clone.pl \
ORACLE_BASE="/u01/app/oracle/" ORACLE_HOME="/u01/app/oracle/product/12.1.0.2/dbhome_1" OSDBA_GROUP=dba -defaultHomeName

[oracle@atz-retail-pos-ordb-dev-db02 dbhome_1]$ /u01/app/oracle/product/12.1.0.2/dbhome_1/perl/bin/perl /u01/app/oracle/product/12.1.0.2/dbhome_1/clone/bin/clone.pl ORACLE_BASE="/u01/app/oracle/" ORACLE_HOME="/u01/app/oracle/product/12.1.0.2/dbhome_1" OSDBA_GROUP=dba -defaultHomeName
./runInstaller -clone -waitForCompletion  "ORACLE_BASE=/u01/app/oracle/" "ORACLE_HOME=/u01/app/oracle/product/12.1.0.2/dbhome_1" "oracle_install_OSDBA=dba" -defaultHomeName  -silent -paramFile /u01/app/oracle/product/12.1.0.2/dbhome_1/clone/clone_oraparam.ini
Starting Oracle Universal Installer...

Checking Temp space: must be greater than 500 MB.   Actual 25367 MB    Passed
Checking swap space: must be greater than 500 MB.   Actual 15359 MB    Passed
Preparing to launch Oracle Universal Installer from /tmp/OraInstall2022-01-26_08-45-55PM. Please wait ...You can find the log of this install session at:
 /u01/app/oraInventory/logs/cloneActions2022-01-26_08-45-55PM.log
..................................................   5% Done.
..................................................   10% Done.
..................................................   15% Done.
..................................................   20% Done.
..................................................   25% Done.
..................................................   30% Done.
..................................................   35% Done.
..................................................   40% Done.
..................................................   45% Done.
..................................................   50% Done.
..................................................   55% Done.
..................................................   60% Done.
..................................................   65% Done.
..................................................   70% Done.
..................................................   75% Done.
..................................................   80% Done.
..................................................   85% Done.
..........
Copy files in progress.

Copy files successful.

Link binaries in progress.

Link binaries successful.

Setup files in progress.

Setup files successful.

Setup Inventory in progress.

Setup Inventory successful.

Finish Setup successful.
The cloning of OraHome1 was successful.
Please check '/u01/app/oraInventory/logs/cloneActions2022-01-26_08-45-55PM.log' for more details.

Setup Oracle Base in progress.

Setup Oracle Base successful.
..................................................   95% Done.

As a root user, execute the following script(s):
        1. /u01/app/oracle/product/12.1.0.2/dbhome_1/root.sh


..................................................   100% Done.


Execute root.sh


### root.sh
[root@localhost installation]# /u01/app/oracle/product/12.1.0.2/dbhome_1/root.sh
Check /u01/app/oracle/product/12.1.0.2/dbhome_1/install/root_atz-retail-pos-ordb-dev-snap-db03_2022-01-31_19-54-49.log for the output of root script
[root@local-host ]#
[root@local-host ]# cat /u01/app/oracle/product/12.1.0.2/dbhome_1/install/root_atz-retail-pos-ordb-dev-snap-db03_2022-01-31_19-54-49.log
Performing root user operation. The following environment variables are set as: ORACLE_OWNER= oracle ORACLE_HOME= /u01/app/oracle/product/12.1.0.2/dbhome_1 Copying dbhome to /usr/local/bin ... Copying oraenv to /usr/local/bin ... Copying coraenv to /usr/local/bin ... Entries will be added to the /etc/oratab file as needed by Database Configuration Assistant when a database is created Finished running generic part of root script. Now product-specific root actions will be performed. [root@localhost]#

Make sure to check the relinking log file for verification


### latest log 
view /u01/app/oracle/product/12.1.0.2/dbhome_1/install/relink.log

Relink 

In this scenario, We had faced issues while trying to create a database. Even though the cloning showed as successful, there were some relinking issues. The decision was to relink the binary manually using the below-listed commands.


cd $ORACLE_HOME/rdbms/lib
make -f $ORACLE_HOME/rdbms/lib/ins_rdbms.mk ipc_rds ioracle
$ORACLE_HOME/bin/relink all
$ORACLE_HOME/bin/skgxpinfo

Relink issues

Open the latest relink log file and "/u01/app/oracle/product/12.1.0.2/dbhome_1/install/relink.log" and search for errors. We found permission issues on two binary files.

test ! -f /u01/app/oracle/product/12.1.0.2/dbhome_1/bin/extjob || (\
   mv -f /u01/app/oracle/product/12.1.0.2/dbhome_1/bin/extjob /u01/app/oracle/product/12.1.0.2/dbhome_1/bin/extjobO &&\
   chmod 600 /u01/app/oracle/product/12.1.0.2/dbhome_1/bin/extjobO )
chmod: changing permissions of ‘/u01/app/oracle/product/12.1.0.2/dbhome_1/bin/extjobO’: Operation not permitted
make: [iextjob] Error 1 (ignored)
mv /u01/app/oracle/product/12.1.0.2/dbhome_1/rdbms/lib/extjob /u01/app/oracle/product/12.1.0.2/dbhome_1/bin/extjob

test ! -f /u01/app/oracle/product/12.1.0.2/dbhome_1/bin/jssu || (\
   mv -f /u01/app/oracle/product/12.1.0.2/dbhome_1/bin/jssu /u01/app/oracle/product/12.1.0.2/dbhome_1/bin/jssuO &&\
   chmod 600 /u01/app/oracle/product/12.1.0.2/dbhome_1/bin/jssuO )
chmod: changing permissions of ‘/u01/app/oracle/product/12.1.0.2/dbhome_1/bin/jssuO’: Operation not permitted
make: [ijssu] Error 1 (ignored)
mv /u01/app/oracle/product/12.1.0.2/dbhome_1/rdbms/lib/jssu /u01/app/oracle/product/12.1.0.2/dbhome_1/bin/jssu

Solution

Make sure to check the permission first on the binary before making any changes. To get a clear idea about the binary files, you have to check the permission on the source server. To overcome this permission error we changed the permission to oracle and performed relink again.


[oracle@localhost]$ ls -l /u01/app/oracle/product/12.1.0.2/dbhome_1/bin/extjobO
-rwsr-x---. 1 root oinstall 1630568 Jan 31 19:51 /u01/app/oracle/product/12.1.0.2/dbhome_1/bin/extjobO
[oracle@localhost]$ ls -l /u01/app/oracle/product/12.1.0.2/dbhome_1/bin/jssuO
-rwsr-x---. 1 root oinstall 46920 Jan 31 19:51 /u01/app/oracle/product/12.1.0.2/dbhome_1/bin/jssuO [oracle@local-host]$

Wednesday, January 26, 2022

ODA upgrade issues for - 12.1.2.6 to 12.1.2.10


ODA(Oracle Data Appliance) upgrades are really challenging. There is a high possibility that server upgrades can give you a hiccups during the grid component upgrade. This occurs mostly due to oakcli orchestration tool because oakcli completes certain checks sequentially before moving to the patching section. Having a clear understanding of each and every step gives the confidence to troubleshoot and overcome complex issues.

Patience is really important here, Once you reboot the oda_base nodes to take backups, mounting repos on dom0 takes close to 15- 20 min. During that time you can validate whether exportfs cluster settings are in order.

To verify the correctness of the exportfs below noted commands could be executed.

First, check the crsctl havip dependencies, if the dependencies are up and running it will take close to 15 min to show the repo on dom0


[root@ecl-odabase-0 ~]# crsctl status res ora.havip_3.havip -p | grep -i havip
NAME=ora.havip_3.havip
TYPE=ora.havip.type
HAVIP_DESCRIPTION=HAVIP_NODE1
HAVIP_ID=havip_3
START_DEPENDENCIES=hard(ora.net3.network,uniform:type:ora.havip_3.export.type) attraction(ora.data.kali_test.acfs,ora.data.kali_test.acfs,ora.data.qualys.acfs,ora.data.vmdata.acfs,ora.reco.vmsdev.acfs) dispersion:active(type:ora.havip.type) pullup(ora.net3.network) pullup:always(type:ora.havip_3.export.type)
STOP_DEPENDENCIES=hard(intermediate:ora.net3.network,uniform:intermediate:type:ora.havip_3.export.type)
[root@ecl-odabase-0 ~]#

After checking dependencies check havip status.


[root@ecl-odabase-0 ~]# crsctl status res -t | grep -A 2 -i havip
ora.havip_3.havip
      1        ONLINE  ONLINE       ecl-odabase-0            STABLE
ora.havip_4.havip
      1        ONLINE  ONLINE       ecl-odabase-1            STABLE


Execute srvctl config and status commands to check havips are healthy


srvctl config havip
srvctl status havip

Expected output


[root@ecl-odabase-0 ~]# srvctl config havip
HAVIP exists: /havip_3/192.168.18.21, network number 3
Description: HAVIP_NODE1
Home Node: ecl-odabase-0
HAVIP is enabled.
HAVIP is individually enabled on nodes:
HAVIP is individually disabled on nodes: ecl-odabase-1
HAVIP exists: /havip_4/192.168.19.21, network number 4
Description: HAVIP_NODE2
Home Node: ecl-odabase-1
HAVIP is enabled.
HAVIP is individually enabled on nodes:
HAVIP is individually disabled on nodes: ecl-odabase-0

[root@ecl-odabase-0 ~]# srvctl status havip
HAVIP ora.havip_3.havip is enabled
HAVIP ora.havip_3.havip is individually disabled on nodes ecl-odabase-1
HAVIP ora.havip_3.havip is running on nodes ecl-odabase-0
HAVIP ora.havip_4.havip is enabled
HAVIP ora.havip_4.havip is individually disabled on nodes ecl-odabase-0
HAVIP ora.havip_4.havip is running on nodes ecl-odabase-1
[root@ecl-odabase-0 ~]#


These are checks triggered via oakcli orchestration tool. 

1. Check VM's are up and running, if so oakcli will shutdown the vms.

2. Check repo's are up and running, if so oakcli will shutdown the repos.

3. Check grid is up and running on both the nodes, as patching happens rolling fashion oakcli will shutdown the grid on the patching node.


There are certain checks that need to be completed by oakcli before moving on to the patching stage. Chances are high on getting errors while upgrading the grid and repo getting invisible from dom0. Mostly repo issues occur due to missing configuration from the cluster side. I went through the roller-coaster ride while upgrading  ODA from 12.1.2.6 to 12.1.2.10. 

This 12.1.2.6 to 12.1.2.10 is a minor upgrade. But still, We have encountered major issues on the repo and grid component. In this article, I will illustrate how to overcome this major grid issue.

On completion of node 2 upgrade, We had to deal with the repo visibility issue from dom0, After consulting oracle we did a reboot of oda_base nodes via ilom . Once the reboot is completed the asm exits on rolling patch mode. Because node02 was completed the grid patching, the cluster was in rolling patching mode.

This is the oracle documentation used to start asm in rolling patch mode.

https://docs.oracle.com/database/121/OSTMG/GUID-CF124D9F-FF28-4B71-B179-640F1258E98A.htm#OSTMG95330


SELECT SYS_CONTEXT('SYS_CLUSTER_PROPERTIES', 'CLUSTER_STATE') FROM DUAL;

SELECT SYS_CONTEXT('SYS_CLUSTER_PROPERTIES', 'CURRENT_PATCHLVL') FROM DUAL;

Sample output: This is sample output where the cluster is in a normal state.


SQL> show parameter db_uni

NAME                                 TYPE        VALUE
------------------------------------ ----------- ------------------------------
db_unique_name                       string      +ASM
SQL> SELECT SYS_CONTEXT('SYS_CLUSTER_PROPERTIES', 'CLUSTER_STATE') FROM DUAL;

SYS_CONTEXT('SYS_CLUSTER_PROPERTIES','CLUSTER_STATE')
--------------------------------------------------------------------------------
Normal

SQL> SELECT SYS_CONTEXT('SYS_CLUSTER_PROPERTIES', 'CURRENT_PATCHLVL') FROM DUAL;

SYS_CONTEXT('SYS_CLUSTER_PROPERTIES','CURRENT_PATCHLVL')
--------------------------------------------------------------------------------
221230242

SQL>

First, try to start the ASM in rolling mode


ALTER SYSTEM START ROLLING PATCH;

Solution: if you cannot put asm on rolling patch mode.

In our scenario, We were not able to put the asm on rolling patching mode, Only option left was to compare the patches and apply those missing patching on node01 There is a simple way to compare the patches on both nodes rather than running opatch lsinventory command.


[grid@piodadb0 ~]$ kfod op=patches
---------------
List of Patches
===============
19769480
20299023
20831110
21359755
21436941
21948344
21948354
22266052
[grid@piodadb0 ~]$ kfod op=patchlvl
-------------------
Current Patch level
===================
964513507
[grid@piodadb0 ~]$


-- Node02 - fully patched and there are few missing patches , it's even not there in opatch lsinventory.
[grid@piodadb1 ~]$ kfod op=patches
---------------
List of Patches
===============
19769480
20299023
20831110
21359755
21436941
21948344 -- Missing
21948354
22266052 -- Missing 
22291127
23054246
24006101
24732082
24828633
24828643

-- get the patch level
[grid@piodadb1 ~]$ kfod op=patchlvl
-------------------
Current Patch level
===================
2648582804

To make the grid patch level consistent we installed all the missing grid patches on node01 manually.

Apply grid patches manually.

All the required commands are there in the patching readme file, I just copied sample commands to make it easier.


-- Patch location
/opt/oracle/oak/pkgrepos/orapkgs/DB/12.1.0.2.170117/Patches/24732082

-- sample commands 
$ <GI_HOME>/OPatch/opatch apply -oh <GI_HOME> -local <UNZIPPED_PATCH_LOCATION>/%BUGNO%/<OCW TRACKING BUG>
$ <GI_HOME>/OPatch/opatch apply -oh <GI_HOME> -local <UNZIPPED_PATCH_LOCATION>/%BUGNO%/<ACFS TRACKING BUG>
$ <GI_HOME>/OPatch/opatch apply -oh <GI_HOME> -local <UNZIPPED_PATCH_LOCATION>/%BUGNO%/<DBWLM TRACKING BUG>
$ <GI_HOME>/OPatch/opatch apply -oh <GI_HOME> -local <UNZIPPED_PATCH_LOCATION>/%BUGNO%/<RDBMS PSU TRACKING BUG>

-- actual commands
export ORACLE_HOME=/u01/app/12.1.0.2/grid
$ORACLE_HOME/crs/install/rootcrs.sh -prepatch 

Note : if needed 
$grid_home/crs/install/rootcrs.sh -unlock -- manually unlock

$ /u01/app/12.1.0.2/grid/OPatch/opatch apply -oh /u01/app/12.1.0.2/grid -local /u01/12.1.0.2.170117_Patch/24917825/24828633 #OCW
$ /u01/app/12.1.0.2/grid/OPatch/opatch apply -oh /u01/app/12.1.0.2/grid -local /u01/12.1.0.2.170117_Patch/24917825/24828643 #ACFS
$ /u01/app/12.1.0.2/grid/OPatch/opatch apply -oh /u01/app/12.1.0.2/grid -local /u01/12.1.0.2.170117_Patch/24917825/21436941 #DBWLM 
$ /u01/app/12.1.0.2/grid/OPatch/opatch apply -oh /u01/app/12.1.0.2/grid -local /u01/12.1.0.2.170117_Patch/24917825/24732082 #Database Bundle

## Post patching

export ORACLE_HOME=/u01/app/12.1.0.2/grid
$ORACLE_HOME/rdbms/install/rootadd_rdbms.sh
$ORACLE_HOME/crs/install/rootcrs.sh -postpatch


On completion of manual grid patching, I found that the grid cluster version shows the different patch level. First, make sure to run opatch lsinvetory and understand the patches installed on grid home. Also, We can use kfod op=patchlvl command to verify the grid patch level and execute kfod op=patches to verify installed patches.

As a practice, I used lspatches to validate psu that applied from the quarterly patch bundle.


-- run this on both nodes
kfod op=patches
-- grid patching level
kfod op=patchlvl
[grid@piodadb0 ~]$ /u01/app/12.1.0.2/grid/OPatch/opatch lspatches 24732082;Database Patch Set Update : 12.1.0.2.170117 (24732082) 24828643;ACFS Patch Set Update : 12.1.0.2.170117 (24828643) 24828633;OCW Patch Set Update : 12.1.0.2.170117 (24828633) 21436941;WLM Patch Set Update: 12.1.0.2.5 (21436941) OPatch succeeded. [grid@piodadb0 ~]$

Also, it's better to check the applied date as verification.


export GI=/u01/app/12.1.0.2/grid
/u01/app/12.1.0.2/grid/OPatch/opatch lsinventory -oh $GI | grep ^Patch

[grid@piodadb0 ~]$ /u01/app/12.1.0.2/grid/OPatch/opatch lsinventory -oh $GI | grep ^Patch
Patch  24732082     : applied on Sun Dec 05 12:56:58 EST 2021
Patch description:  "Database Patch Set Update : 12.1.0.2.170117 (24732082)"
Patch  24828643     : applied on Sun Dec 05 12:54:57 EST 2021
Patch description:  "ACFS Patch Set Update :  12.1.0.2.170117 (24828643)"
Patch  24828633     : applied on Sun Dec 05 12:51:01 EST 2021
Patch description:  "OCW Patch Set Update : 12.1.0.2.170117 (24828633)"
Patch  21436941     : applied on Wed Oct 21 22:30:48 EDT 2015
Patch description:  "WLM Patch Set Update: 12.1.0.2.5 (21436941)"
Patch level status of Cluster nodes :
[grid@piodadb0 ~]$

We found that still there are some additional patches , but it's not there in the binary level . First consult this with oracle engineer and get the confirmation to remove these patches on existing node. you can remove these patches from grid binary level. Missing patches were not installed on binary level , so we had to remove those patches from grid, We used below mention command to remove patch from grid.


$grid_home/bin/patchgen commit -rb <missing-patch> command . 

Once complete on removing the patches on binary level We need to run patch command to lock the grid. Once patch command completes verify the cluster patch level and installed patches on both nodes


$grid_home/crs/install/rootcrs.sh -patch

Conclusion

Before proceeding with patching always create a proactive SR with oracle , as Virtulized ODA upgrades are tricky

Stay Secure Without Stopping: Leveraging Oracle TAC and Rolling Patching in the AI-Driven Era

  Intro We live in an era where businesses are powered by data, running their most critical systems on robust platforms like Ora...